Flooring and Interior Decoration

KnowHow_Flooring_B_Start.jpg
A floor that is properly welded is critical when it comes to hygienically sensitive surfaces. This is why most floors in public buildings such as hospitals or schools need to be welded properly, as well as in public transportation facilities such as planes, trains, or buses. A high-quality weld is also required in residential construction or offices to satisfy design requirements or to achieve a specific design.

Welding and Pointing

For flooring applications with surface areas that have hygienic requirements which are also exposed to moisture (wet rooms) or in rooms subject to intensive wet cleaning, properly welded floors are a must.

The Welding Process

Adhesive recommended by the manufacturer is required installing linoleum and rubber. Usually 3 to 5 mm welding rod of the same material, that is recommended by the manufacturer is used for welding PVC or TPU surfaces.

Before welding, the seam edges are grooved to approx. 2/3 of the thickness of the surface and then heat seam welded with the welding rod.

It is important that the welding rod is fully melted into the milled surface created by the groover. The rod is then trimmed level to the surface in two steps using the Leister quarter-moon knife: In the first stage, the rod is trimmed using the half moon knife and slide immediately after welding/pointing. A second pass is made with the knife once the welded seam has completely cooled down. This prevents the welding rod from being trimmed below the level flooring material and produces an even, flush surface.

The Steps of Welding

Grooving

The flooring material must be glued to the substrate using the adhesive recommended by the
manufacturer.

Caution: Before grooving, the adhesive between the substrate (screed) and the floor covering
must be dry.

A groove is then milled in the floor covering using the GROOVER.

Caution: Work step by step: Groove first, then weld.

Different blades are used depending on the floor welding application.

Caution: This will depends upon the welding and the properties of the flooring material.

KnowHow_Flooring_B_1.jpg

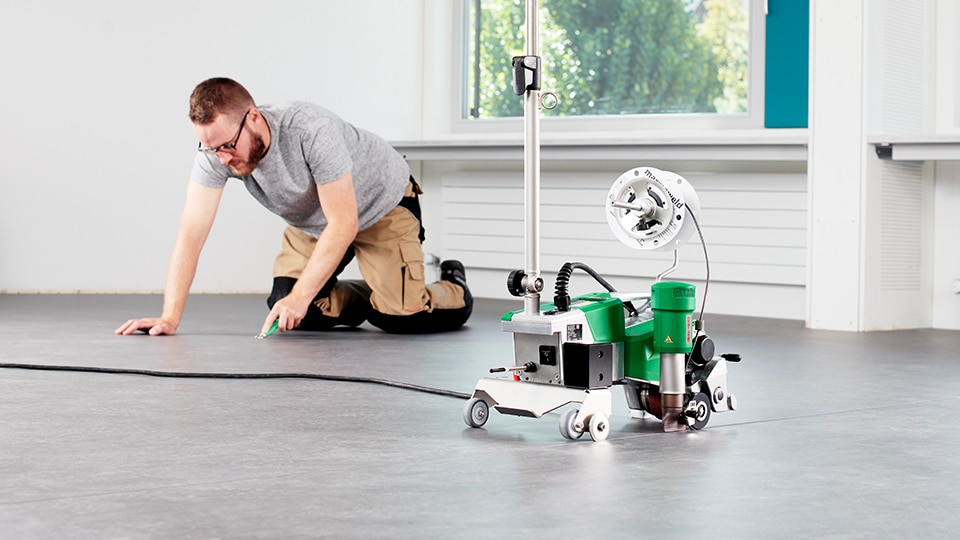
The cutting depth is determined based on the following (Fig. 1):

  • A maximum of half of the welding rod diameter.
  • No more than 2/3 of the flooring material thickness
  • Linoleum to fabric (jute / reinforcement)


Before Welding

The milled groove must be positioned in the center of the seam, otherwise the weld will not be
adequate (Fig. 2).

Caution: Before beginning the weld, a separate weld test must always be performed to verify the heat. Speed and temperature settings are correct for each application.

The welding parameters must be set so that a weld bead forms (Fig. 3).

Material   Manual welding temperature    Automatic welding temperature
Linoleum    Approx. 300 - 400°C   Approx. 400 - 450°C 
PUR/TPU   Approx. 350 - 400°C   Approx. 450 - 500°C 
PVC   Approx. 350 - 450°C   Approx. 450 - 550°C
KnowHow_Flooring_B_2.jpg

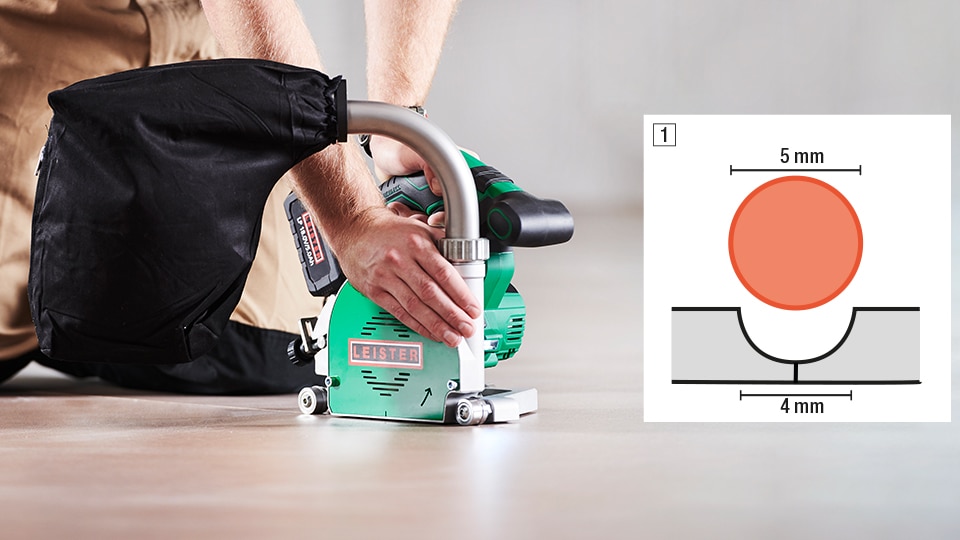
A welding nozzle with a narrow air outlet must be used in order to avoid any impairment to the surface covering.

Caution: An impairment only becomes visible after several cleaning cycles. Short welded seams a more easily welded with a TRIAC ST/AT or the HOT JET S than a MINIFLOOR or UNIFLOOR machine.

Welding

Welding with an automatic welder (UNIFLOOR 500 / MINIFLOOR)

Is recommended for time savings and precise / repeatable welded seam results.

  • Constant (high) speed
  • Constant pressure
  • Constant temperatures (UNIFLOOR 500 / MINIFLOOR with TRIAC AT)

Caution: For the UNIFLOOR, the 2/3 flap must be closed for linoleum.

KnowHow_Flooring_B_3.jpg

Manual Welding (TRIAC / HOT JET S / GHIBLI)

Recommended for short grooves, repairs, or transitions

For a consistent weld quality, the following must be taken into consideration

  • Speed as constant as possible
  • Pressure as constant as possible
  • Constant temperature (TRIAC AT)

Cutting –First Step

The first detachment procedure takes place when the welding rod is not yet cool using a sharpened quarter-moon knife and a slide attachment.

KnowHow_Flooring_B_4.jpg

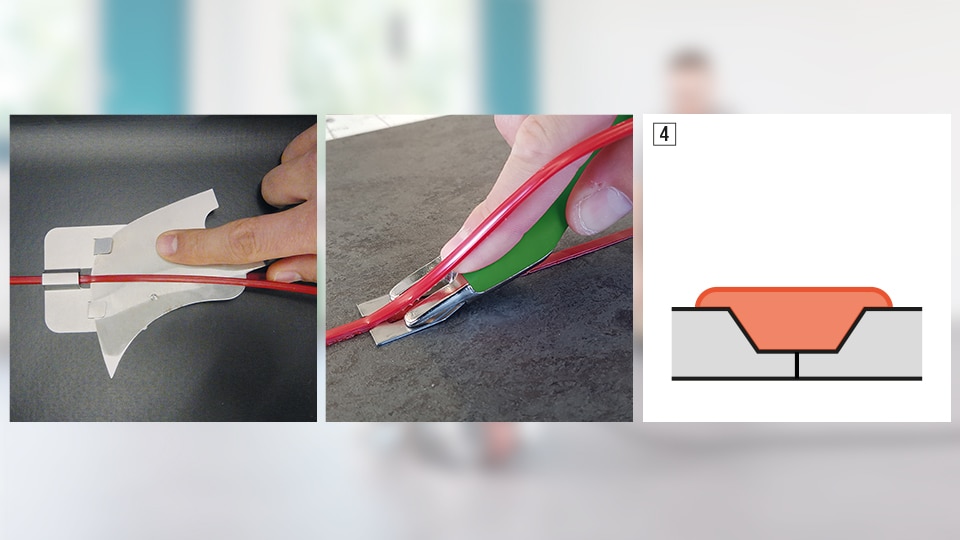
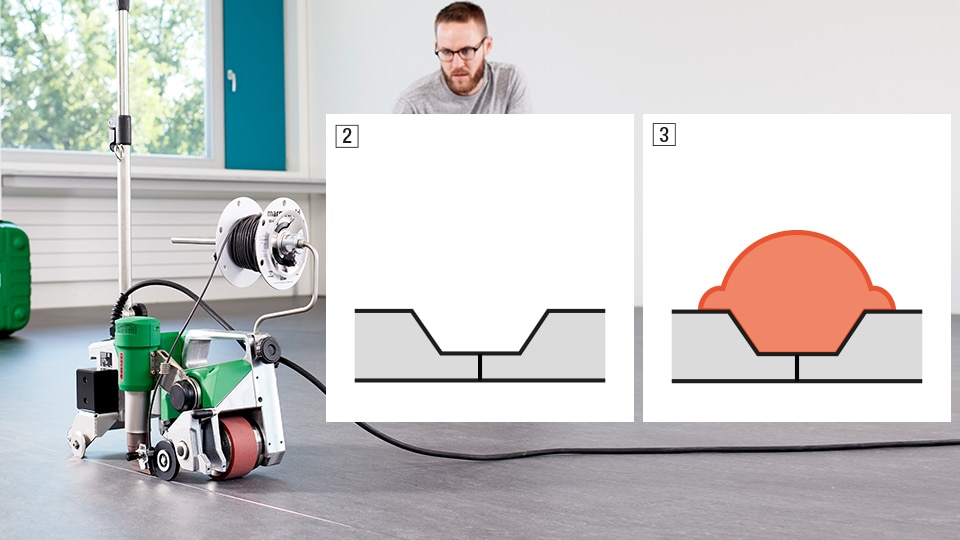
Caution: It is essential that the welding wire is cut in two stages. This prevents the weld from sagging below the level surface. (Fig. 4).

Cutting –Second Step

The second trimming procedure only takes place when the welded seam has cooled down. The cut is made flush to the surface covering using the quarter moon knife again.

The second cut takes place after the first cut and after a rest period.

  • Rest period for linoleum approx. 15 minutes
  • Rest period for PVC approx. 5 minutes
KnowHow_Flooring_B_5.jpg

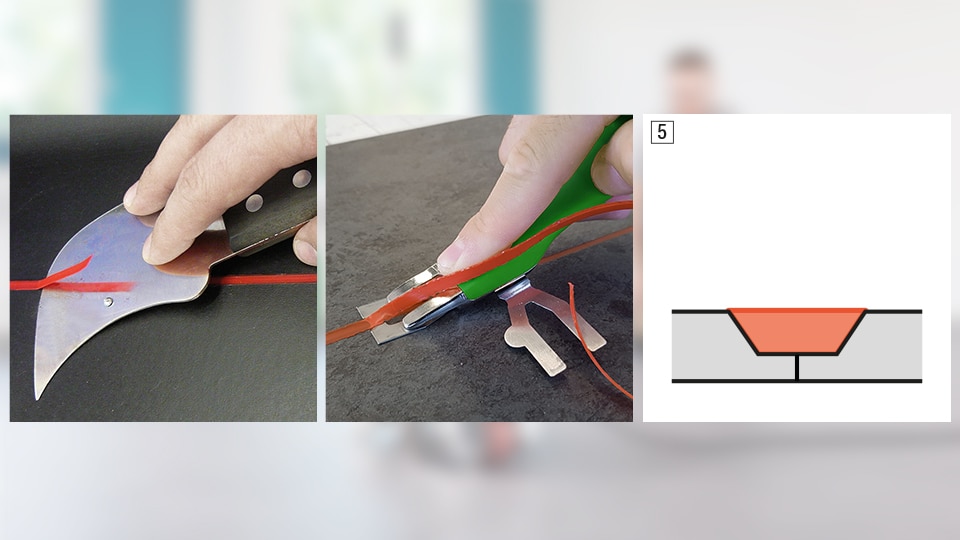
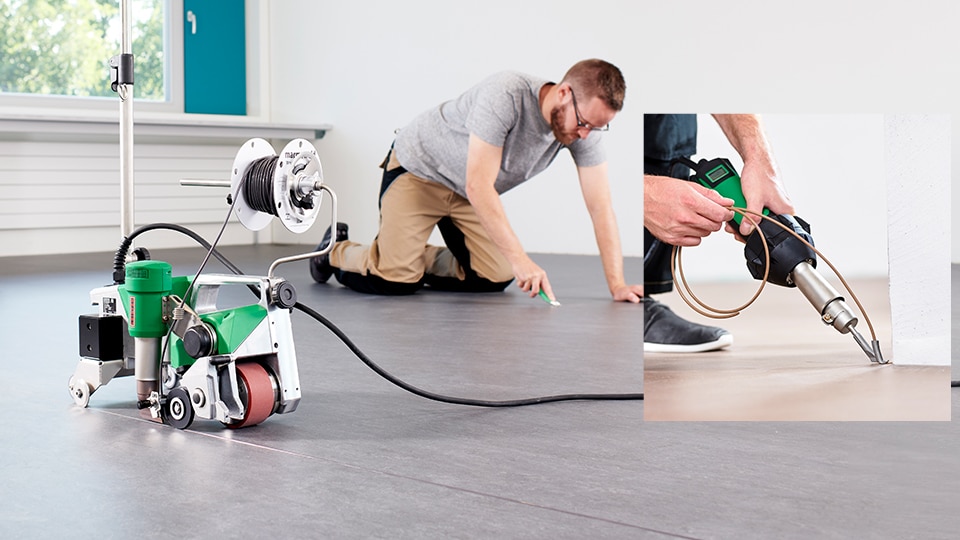
The surface is now able to bear a load and can be cleaned (Fig. 5).

  • Rest period for linoleum until it can bear a full load approx. 12 hours
  • Rest period for PVC until it can bear a full load approx. 1 hour

Questions? Please contact us.

Do you have any questions? Would you like to give us feedback? Do not hesitate to contact us.